
The map gives you a clear visual overview of the incident alongside the main log. You can add and filter information, use drawing tools, and add map layers such as weather. You can also take snapshots of the map and add them directly to the log. This makes it easier to follow the situation and keep track of changes as the incident develops.
You will find the map next to the main feed. You can zoom in and out with the + and − buttons on the right-hand side of the map.
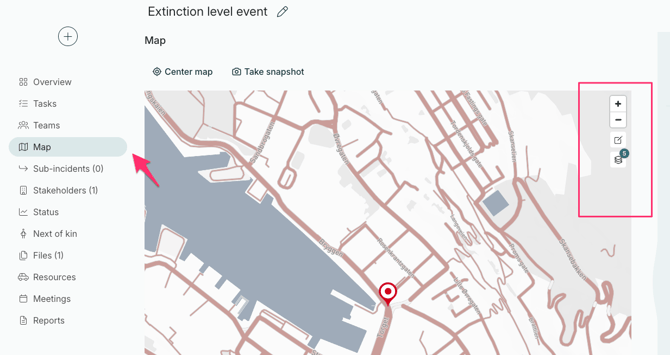
The map can be used to see the location of:
- Key Events
- Sub-Incidents
- Resources
- Sites
- Participants (and you can choose to see the participants names)
Participants
If a user logs in to the RAYVN app on their mobile device and accepts to share the location, the user's position will be shown in real-time on the map with an icon and the user's name.
In order to turn on and off tracking on the mobile phone, hit the tracking link and select on or off there.

Sub-incidents
Sub-incidents can be added to the map by selecting the sub-incident in the side panel on the left-hand side. When you have selected a sub-incident, you will see a button called “Position Sub-incident”. This will open the map and allow you to select a position for the sub-incident. Now you can add the position of the sub-incident in three different ways:
-
By address. Enter the address in the address field on the map. As you type the address, RAYVN will suggest street addresses automatically. Select the correct one and press Enter. Hit the “Select this position” button.
-
By Geo position. Enter the geo-position in the Geo position input field and hit the “Select this position” button.
-
Drag the marker directly on the map. When you click, you will see that the input field for geo position is updated. Click “Select this position”.
Key Events
When posting a log entry marked as "Key event", a marker will be placed on the map to indicate the logger's location at the time of the entry.
Map layers
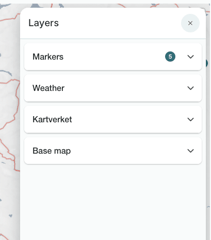
All map layers are collected in one panel. Click the “Layers” button on the right-hand side of the map to open it. In the panel you can choose:
- Markers: which markers are shown on the map, as described below.
- Weather: clouds, precipitation forecast, sea level pressure, temperature, wind speed and direction, and precipitation radar.
- Kartverket (the Norwegian Mapping Authority): topographic map and nautical chart. The maps from Kartverket only cover Norway and the Norwegian Exclusive Economic Zone. To use the maps from Kartverket, the integration must be activated. Go to the project settings, select "Integrations" and click "Activate". The integration is included for all customers.
- Base map: Standard or Satellite.
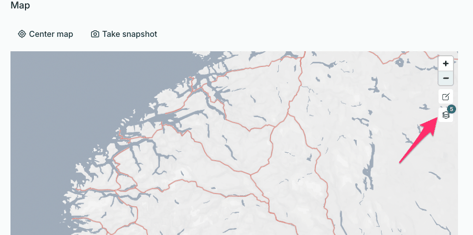
Weather layers can be useful in incidents where conditions such as wind or precipitation affect the response.
The base map and the maps from Kartverket always stay underneath weather layers, drawings and markers, so nothing you have added gets hidden. Your layer choices are saved, so they are still in place when you reload the page.
Maps from Kartverket
The map can show open Norwegian maps from Kartverket. You can choose between a topographic map and a nautical chart.
To use the maps from Kartverket, the integration must be activated. Go to the project settings, select "Integrations" and click "Activate". The integration is included for all customers.
Markers
You can choose which markers are shown on the map, so you only see the information you need. Open “Layers” on the right-hand side of the map, and turn markers on or off under “Markers”. You can choose between:
- Key events
- Sub-incidents
- Resources
- Sites
- Participants
Drawing tools
You can mark lines, shapes and areas on the map by using the drawing tools, located on the right-hand side of the map. The drawing tools open in a vertical drawer, and the tool you are drawing with is highlighted, so you can always see which one is active: 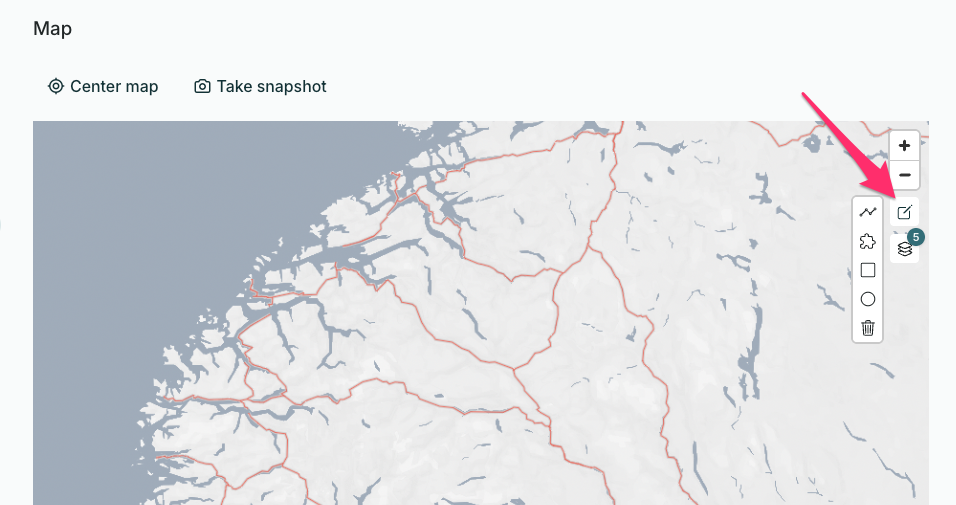
In the drawing tools you can:
- Draw a straight line
- Draw a polygon
- Draw a rectangle
- Draw a circle
- Delete a drawing
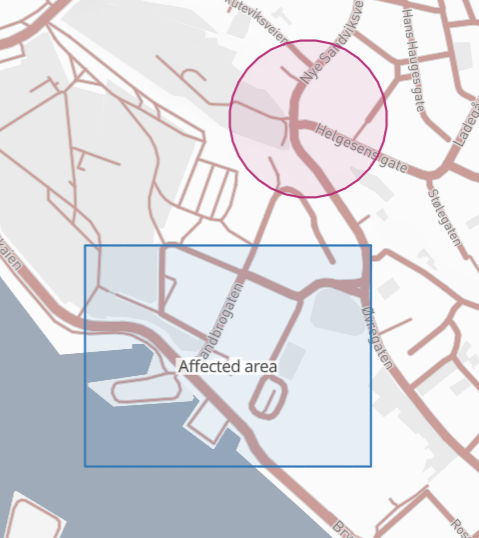
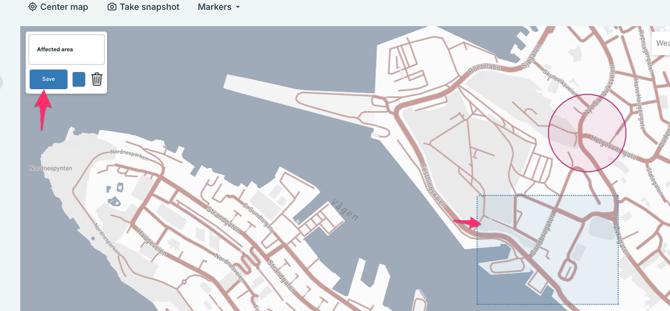
You can change the name or the color of the shape by selecting the shape you want to edit:
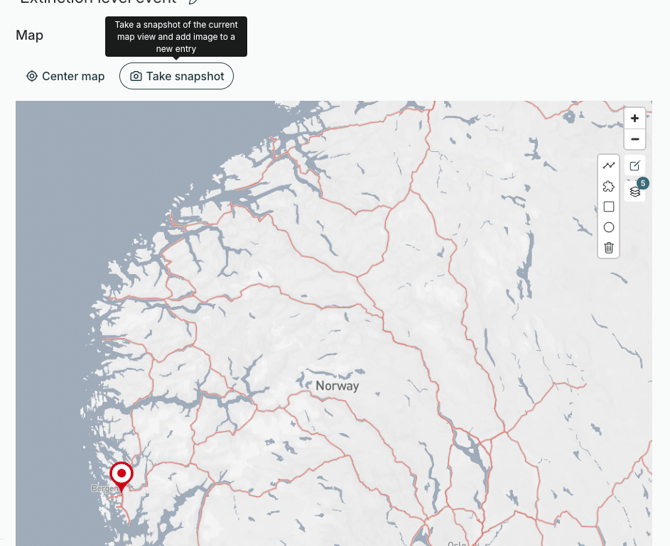
Take a snapshot of your map
If you want to include a picture of your map in your log feed, you can click "Take snapshot". A snapshot will immediately be taken of the area you are viewing in the map. Make sure that you are looking at the area you want to take a picture of, before you click "Take snapshot".
Once you've taken a snapshot, the image will be uploaded to a new log entry. Make any changes to the log entry, like adding some text, and click "Post entry".
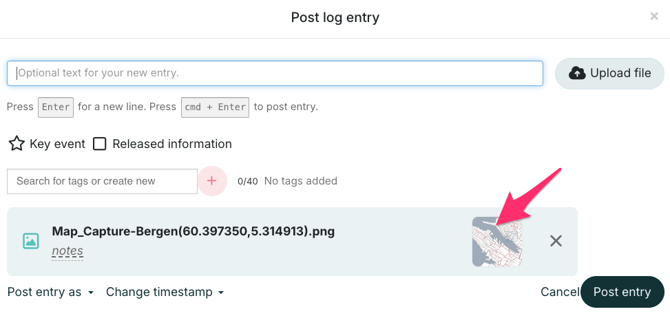
The picture of the will also be available in the "Files and links" section when you've posted your log entry.
Edit the location of your log
Its also possible to change the location of a log after the log has been started, if you are using the web-version of RAYVN.
To change the location, click on the marker next to the title of the log. You'll then see the map, and be able to select a new location for your log.