
When something happens, the first priority is often to reach the right people. In RAYVN you can start an incident in two ways: notify the teams at once, or open the incident first and notify later. This article explains the difference and shows you how to use each option.
Which option should you choose?
Choose Notify when you know what has happened and who needs to know. You choose a notification template, check the teams, channels and message, and the notification is sent when the incident starts.
Choose Notify later when you need an overview before you notify anyone. This is also useful when you prepare an exercise, or when it is not yet clear who should be involved. The incident opens empty, and nothing is sent until you are ready.
With both options, you can add tasks and files later from task list and file list. You add them when the incident needs them, not before.
Notify teams when you start the incident
When you choose Notify, RAYVN takes you through a few short steps. The notification template fills in most of the information for you. In most cases, you only need to check that everything is correct before you send.
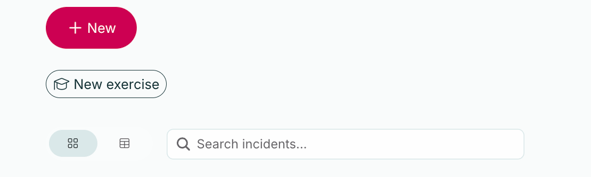
- On the dashboard, click New or New Exercise. A window opens where you choose how to start the incident.
- Enter an incident title under Title, or keep the suggested title. Under Group, choose the group you want to start the incident in. The incident is created in this group.
- Choose Notify.
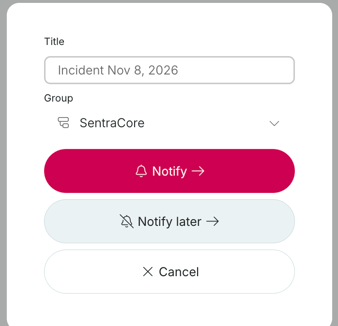
Choose Notify to send a notification when the incident starts.
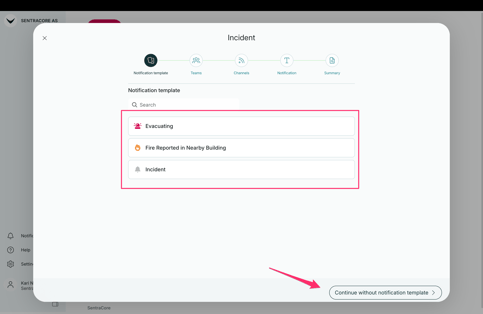
- In the Template step, choose the notification template that best matches the situation. The template fills in the title, the notification text, the teams and the response profile. You can also start without a template. Then you have to fill out the information in every step.
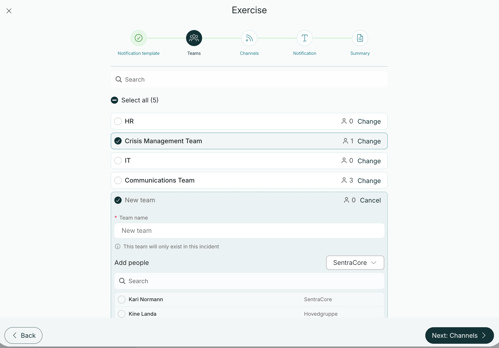
- In the Teams step, check that the correct teams are selected. You can open a team to see its members, and add or remove people. If you want to create a new team specifically for the incident, select "+ New Team".
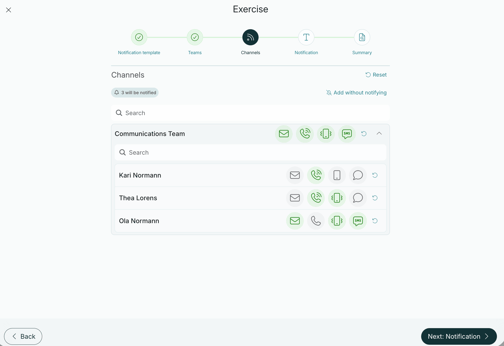
- In the Channels step, check how people will receive the notification: by SMS, email, voice call or app notification. The channels from the team settings are already filled in, but you can turn them on or off for a team or for one person.
- In the Notification step, check the Notification text. This is the message recipients get. You can keep the text from the template or change it to fit the situation. Below the text, you see the answers recipients can choose from. These are defined by the selected Response Profile.
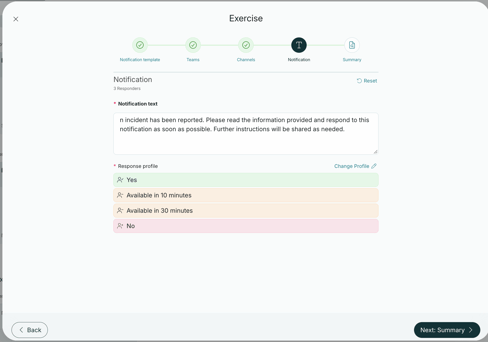
Check the message and the answers recipients can give.
- If you need other answers, click Change profile and choose another response profile. For example, you may need to know when people can arrive, not only whether they can come.
- Click Next: Summary.
- Check the summary and start the incident. The notification is sent when the incident starts.
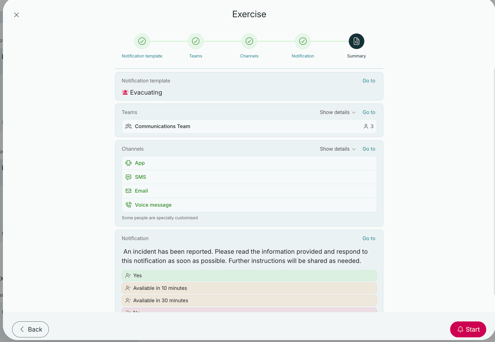
The summary shows the teams, channels and message in one place.
Tip: If you know the template is correct and need to send quickly, click Go to summary in any step. You go straight to the summary, and you can still change everything before you start the incident.
After the notification is sent
Recipients answer by web link, SMS or voice call. In the incident, you can follow in real time who has answered, who has not, and what they answered. Based on the answers, you can build a new team and send a new notification to the people you need.
Start a blank incident and notify later
A blank incident gives you a place to collect information and plan before anyone is notified. No one is mobilized, and you decide when and who to notify.
- On the dashboard, click New.
- Enter an incident title under Title, or keep the suggested title. Under Group, choose the group you want to start the incident in. The incident is created in this group
- Click Notify later. The incident opens without teams, tasks or files, and nothing is sent.
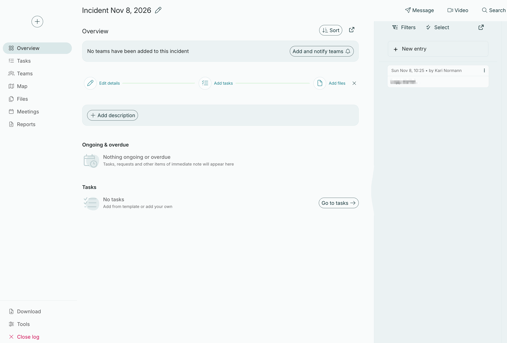
A blank incident. Nothing is sent until you are ready.
- Click Add description next to Description of situation, and describe what has happened. This helps everyone who joins the incident understand the situation.
- Add teams, tasks and files from Teams, Tasks and Files in the incident menu when you need them.